A fashion lecturer from Stratford-upon-Avon College has shared some handy ideas for how to reuse and repurpose old clothes into fun Halloween outfits.
Lecturer Louisa Figus not only shares her skills with her students at the College, but also takes her creativity home with her too.
Louisa loves to celebrate Halloween with her family: “As a mum I love celebrating Halloween with my son! However, I dislike the wasteful, throw away ‘disposable’ nature of Halloween merchandise, that appears to increase year upon year! From costumes that aren’t machine washable to plastic throw away decorations and single-use plastic packaging. The impact on the environment appears to take a back seat in the spirit of having a fun! Is this, ok? As a former Fashion Designer turned lecturer and mum, I personally do not feel that it is. I believe that by thinking more considerately and creatively we can each find small solutions to help minimise our impact on our environment.
This year for Halloween, my 6-year-old son decided he wanted to be Dr Robotnik aka Dr Eggman from the live action film Sonic the Hedgehog. After he initially looked online for costumes which were mainly from the US, I endeavoured to find a ‘homemade’ solution, to save both cost and reduce the environmental impact.

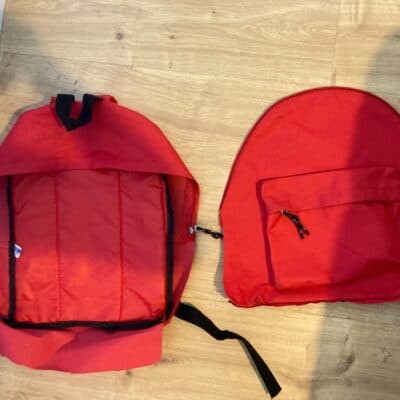
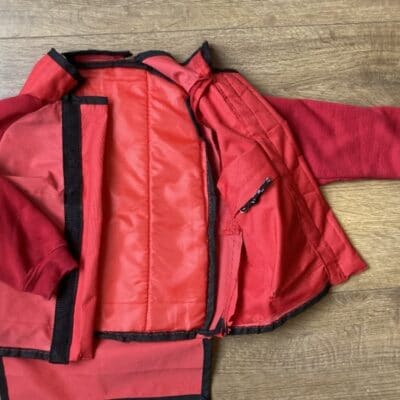
In the process of looking for old junk around the house, with a little creative thinking, and a little time, I was able to turn an old unwanted red backpack and an old red ink-stained school jumper into a new Dr Robotnik inspired Jacket, providing a low-cost sustainable alternative.”
Below are her steps for building this costume using these items: An old backpack, an old stained school jumper, a sewing machine, fabric scissors, pins, black and red thread, bias binding or an old black cotton fabric/garment cut into bias strips.
Step 1: Cut the front off the backpack.
Step 2: Cut the straps off the back of your backpack.
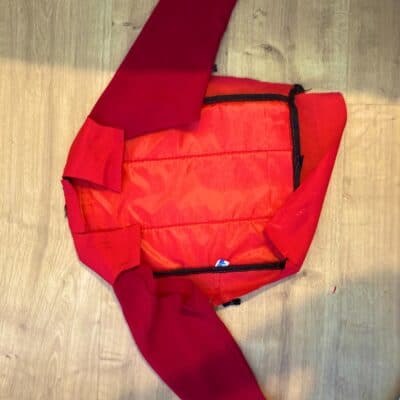
Step 3: Position the back of the backpack with sides still attached to your child’s back, and mark where the top of the shoulder meets the side of the back, and also the underarm. Draw a semi-circular armhole, add 1cm seam allowance back onto your semi-circle, and cut the semi-circle out. This will form half of your armhole.
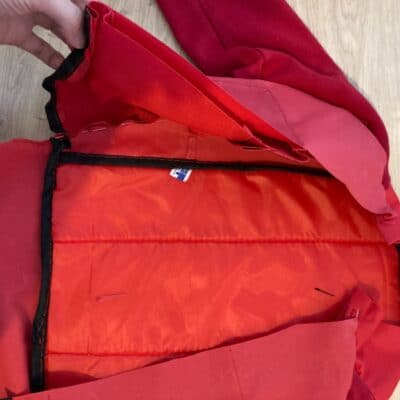
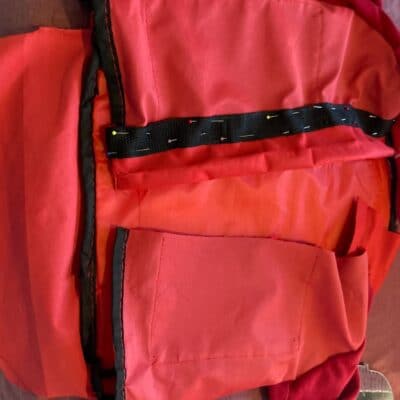
Step 4: Cut the sleeves off the old school jumper, and position into armhole, pin and sew to your semi-circular armhole (see below image). Remember to trim off any excess fabric around armhole, to allow a 1cm seam allowance.
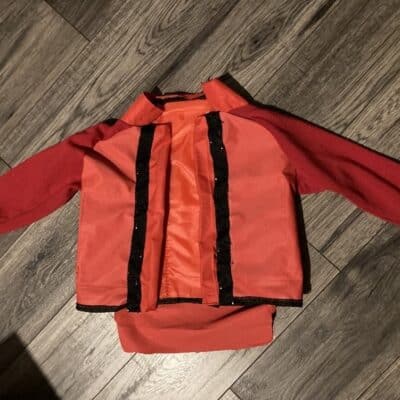
Step 5: Cut the front piece of your backpack in half, and sew the right sides together along the armhole raglan seam and along the side seam to the hem. (My son didn’t want the pocket to be visible on the front, so we turned the front pieces inside out which by default made an internal functional pocket!
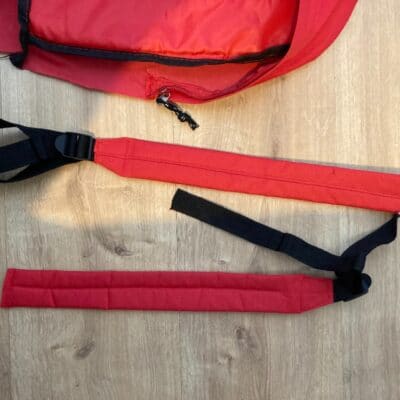
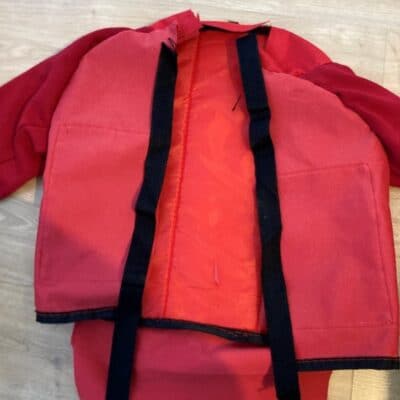
Step 6: Taking your cut off padded straps (see below image), unpick the red padded strap, and use each one as a panel to finish off the front edge of the jacket.
Step 7: Pin and sew this red piece edge to the edge of your front open panel.
Step 8: Cut off the black straps and measure the size against the front of the jacket, remember to leave 1cm seam allowance at the top and bottom hem of the jacket, to be able to tuck inside the jacket panel to give a neat finish.
Step 9: Pin straps into place over the edge where the two front panel edges meet, and stitch in black thread on top, and red thread on the bobbin.
Step 10: Repeat the process on the other side.
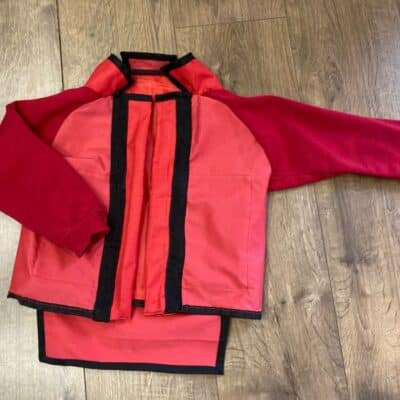
Step 11: Bias bind the front neck, collar edges and back lower edges in bias binding, or an old black cotton fabric/garment cut into bias strips. Pin binding around edges and sew into place to create a neat finish.
The jacket is finished!
“It is amazes me what you can make from Junk with a little creative thinking and some time! My son decided to finish the look with swimming goggles, black t-shirt and pyjama bottoms and a borrowed latex bald cap. Next time you want to buy a costume, maybe have a hunt around your own environment first to see what trash you can find and turn into something new.”


